A smart sprinkler system takes the guesswork out of lawn and garden watering. Instead of manually adjusting timers or hoping your fixed schedule matches the weather, a smart system uses real-time data to water your landscape efficiently. This step-by-step guide walks you through everything from planning your zones to connecting your controller to Wi-Fi and dialing in the perfect schedule.
What Is a Smart Sprinkler System?
A smart sprinkler system combines traditional irrigation hardware — valves, pipes, sprinkler heads, and drip emitters — with an internet-connected controller that adjusts watering automatically. These controllers pull weather forecasts, measure local rainfall, and factor in soil type and plant species to decide when, how long, and how much to water each zone.
The result is a system that responds to your landscape’s actual needs rather than running on a rigid timer. On rainy days, the controller skips the cycle. During heat waves, it extends run times. Over a full season, homeowners typically see 30–50% reductions in outdoor water use compared to conventional timers.
Step 1: Plan Your Irrigation Zones
Before buying any equipment, map out your property and divide it into zones. Each zone groups areas with similar watering requirements. Factors to consider:
- Plant type: Turf grass needs more water than established shrubs or native plantings. Keep drip zones separate from spray or rotor zones.
- Sun exposure: South-facing beds dry out faster than shaded north-facing areas. Assign them to different zones so you can water sunny spots more frequently.
- Soil type: Sandy soil drains fast and may need shorter, more frequent watering. Clay soil absorbs slowly and benefits from cycle-and-soak scheduling.
- Slope: Hillside zones should use lower precipitation rates or multiple short cycles to prevent runoff.
For most residential properties, 4 to 8 zones covers the entire landscape. Sketch your zone map on paper or use a free tool like Hunter’s Hydrawise zone planner.
Step 2: Choose Your Smart Controller
Your controller is the brain of the system. For a detailed comparison, see our Smart Irrigation Controller Buying Guide. Here’s a quick summary of popular options:
- Small yards (1–4 zones): The B-Hyve Smart Hose Timer is affordable and needs zero wiring.
- Mid-size residential (4–16 zones): The Rain Bird ESP4ME3 or Hunter Pro-C with a Hydrawise Wi-Fi facepack are the most popular choices.
- Large properties (16+ zones): The Rain Bird RC2 or Weathermatic SmartLine series handles complex, multi-zone layouts.
Step 3: Select Sprinkler Heads and Valves
Match your sprinkler heads to each zone’s needs:
- Pop-up spray heads: Best for small, uniform lawn areas. Rain Bird’s 1800 series spray heads are an industry standard — we carry the Rain Bird 1800XC spray head caps and full assemblies.
- Rotary nozzles: Cover medium areas with slower, more efficient water delivery. Great for clay soils.
- Gear-driven rotors: Ideal for large turf areas. The Hunter I-25 Stainless Steel Rotor is a premium option for high-traffic zones.
- Drip irrigation: Perfect for flower beds, shrubs, and vegetable gardens. Hunter’s ECO-MAT subsurface drip mat is a professional-grade solution that waters root zones directly.
Each zone needs an electric valve to control water flow. The Hunter ICV-151G Globe Valve is a reliable commercial-grade option, while residential systems often use standard 1″ jar-top valves.
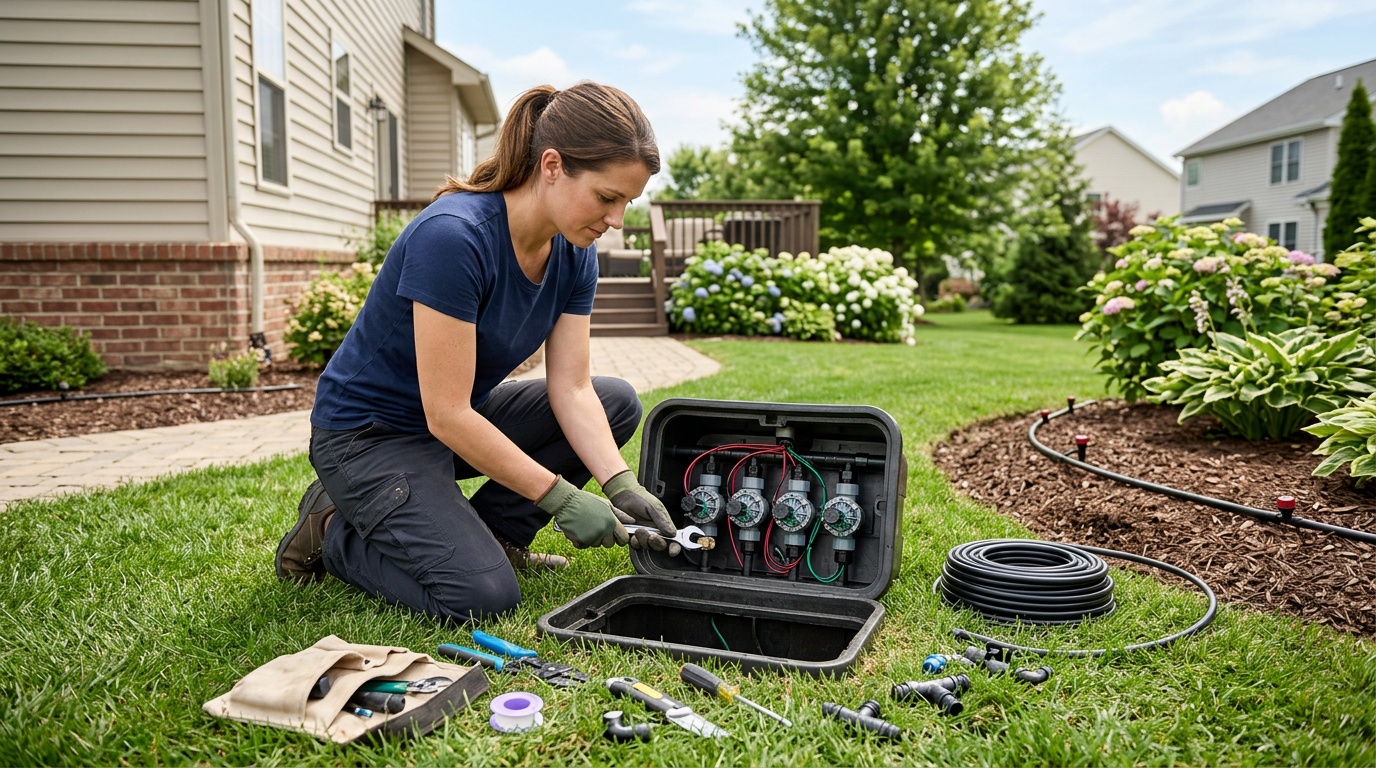
Step 4: Install the Hardware
With your zones mapped and equipment selected, it’s time to install. Here’s the high-level process:
- Trench the mainline and lateral lines. Use Schedule 40 PVC for the mainline (from the water source to the valve manifold) and Class 200 PVC or poly pipe for lateral lines running to each sprinkler head.
- Install valve boxes and valves. Group valves in a central manifold near the water source. Wire each valve back to the controller location using 18-gauge direct-burial irrigation wire.
- Set sprinkler heads. Install heads at the correct height (flush with grade for pop-ups) and adjust spacing for head-to-head coverage. Each head’s spray should reach the adjacent head.
- Connect the controller. Mount the controller in a protected location (garage wall, outdoor enclosure) and connect zone wires and the common wire to the terminal strip.
- Flush the system. Before attaching the final nozzles, turn on each zone to flush debris from the pipes. Then install nozzles and test coverage.
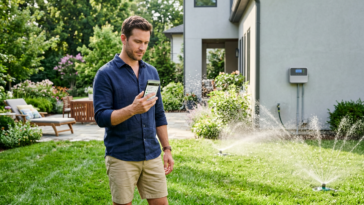
Step 5: Connect to Wi-Fi and Configure
This is where the “smart” part kicks in. After powering on your controller:
- Download the app. Hunter uses the Hydrawise app, Rain Bird uses the Rain Bird app, and B-Hyve has the Orbit B-Hyve app. All are free on iOS and Android.
- Create an account and add your controller. Most controllers pair via Bluetooth initially, then connect to your home Wi-Fi network.
- Set your location. The app uses your GPS coordinates to pull local weather data. This is critical for weather-based adjustments to work properly.
- Configure each zone. Enter the sprinkler type (spray, rotor, drip), soil type, slope, sun exposure, and plant type. The controller uses this information to calculate optimal run times.
- Enable weather intelligence. Turn on rain skip, freeze skip, and seasonal adjustment features. Hydrawise’s “Predictive Watering” and Rain Bird’s “Weather Intelligence Plus” are the two most advanced options.
Step 6: Fine-Tune Your Schedule
Smart controllers do most of the heavy lifting, but you’ll want to observe and adjust during the first few weeks:
- Check for dry spots. Walk the lawn after watering and look for areas that are still dry. Adjust head positions or add heads to fill gaps.
- Watch for runoff. If water pools on sidewalks or driveways, reduce zone run times and enable cycle-and-soak mode, which splits watering into shorter intervals with rest periods to let water absorb.
- Monitor through the app. Review weekly water usage reports and look for zones that seem unusually high or low. This can indicate a broken head, a leak, or a misconfigured zone setting.
- Adjust seasonally. Even with weather intelligence, check your settings at the start of spring and fall. Update plant types if you’ve changed landscaping, and make sure the soil type setting still reflects reality (especially after aeration or topdressing).
Pro Tips for Maximum Water Savings
Beyond the basic setup, these practices will squeeze every drop of efficiency from your smart system:
- Water early morning. Set your allowed start times between 4 AM and 8 AM to minimize evaporation and wind drift.
- Use flow sensors. A flow sensor on your mainline lets the controller detect leaks and broken heads automatically. It can shut down the system and alert you before thousands of gallons are wasted.
- Upgrade to high-efficiency nozzles. Rotary nozzles apply water 3–4 times slower than traditional spray nozzles, giving soil more time to absorb and reducing runoff.
- Add a rain sensor as backup. Even though your controller uses internet weather data, a hardwired rain sensor provides a physical failsafe.
Frequently Asked Questions
How much does a smart sprinkler system cost?
A DIY residential smart sprinkler system typically costs $500–$2,500 depending on yard size and the number of zones. The controller itself ranges from $60 for a hose-end timer to $300+ for a professional-grade Wi-Fi unit. Professional installation adds $2,000–$5,000 for a typical residential property. Browse our irrigation collection for current pricing on all components.
Can I convert my existing sprinkler system to smart?
Absolutely. If you already have underground pipes, valves, and sprinkler heads, the simplest upgrade is replacing your old timer with a smart controller. The Hunter WAND Wi-Fi Module can even add smart capability to an existing Hunter X2 controller without replacing it. Your existing wiring and valves stay in place.
Do I need a strong Wi-Fi signal at my controller location?
Yes, your controller needs a reliable Wi-Fi connection to download weather data and accept remote commands. If your controller is in a detached garage or far from your router, consider a Wi-Fi extender or mesh network node near the controller. Most controllers need at least 2 bars of signal for stable operation.
How often should I check my smart sprinkler system?
Perform a visual inspection once a month during the watering season. Walk each zone while it’s running and look for tilted heads, clogged nozzles, or new obstructions. Check the app weekly for flow alerts or skipped cycles. At the start and end of each season, do a thorough system audit including valve box inspection and backflow testing.
Get Started Today
Ready to build or upgrade your smart sprinkler system? Smart Sprinkler Genius carries professional-grade controllers, sprinklers and valves, and irrigation accessories from Hunter, Rain Bird, Weathermatic, DIG, Toro, and more — all with competitive pricing and fast US-wide shipping.
 No products in the cart.